Eagle BIM service provider in USA

How to Choose the Right BIM Service Provider in the USA

Quick Summary

Most construction problems do not start on the jobsite.

They start months earlier, quietly, inside drawings, spreadsheets, and design files that look perfectly fine in isolation.

An architect develops the layout.
A structural engineer defines the framing.
Mechanical systems find their routes later.

Each discipline works carefully. Each team produces accurate information. Yet when those systems meet inside the same building, conflicts appear.

That moment when the design begins to collide with itself is usually when companies begin looking for a BIM service provider USA.

Not because BIM sounds innovative.
Because coordination suddenly becomes expensive.

Autodesk’s construction research has repeatedly shown that poor project data and miscommunication contribute significantly to avoidable rework across the industry. BIM workflows help reduce that risk by identifying conflicts early in the design phase, before they reach the site.

So the real challenge is not deciding whether to use BIM.

It is deciding who should help you run it.

What A BIM Service Partner Actually Does

A BIM service partner helps project teams coordinate design information across disciplines before construction begins.

That description sounds simple. In reality, it touches nearly every stage of project planning.

Most BIM teams support work such as:

  • architectural modeling
  • structural modeling
  • MEP modeling
  • clash detection and coordination
  • construction documentation
  • quantity takeoffs
  • digital model management

Many firms also offer advisory support through BIM consulting services, helping organizations establish modeling standards, coordination workflows, and execution plans.

Autodesk defines Building Information Modeling as a process that allows teams to create and manage structured building data throughout the lifecycle of a project, not just a 3D representation.

This distinction matters.

The goal of BIM is not visualization.

The goal is coordination clarity.

Why This Decision Matters More Than It Seems

Hiring a BIM partner is rarely about drawing models faster.

It is about reducing uncertainty across the entire project.

Construction teams rely on coordinated information to plan installations, manage trades, and avoid conflicts between systems. BIM-based coordination allows teams to review those systems together before construction begins, reducing rework and improving project predictability.

In other words, BIM shifts problem-solving earlier in the timeline.

Instead of discovering conflicts during construction, teams identify them during design coordination.

That change alone can dramatically reduce disruption on site.

Services Most BIM Firms Provide

While offerings vary between companies, most BIM partners support a similar set of core services.

Modeling Across Disciplines

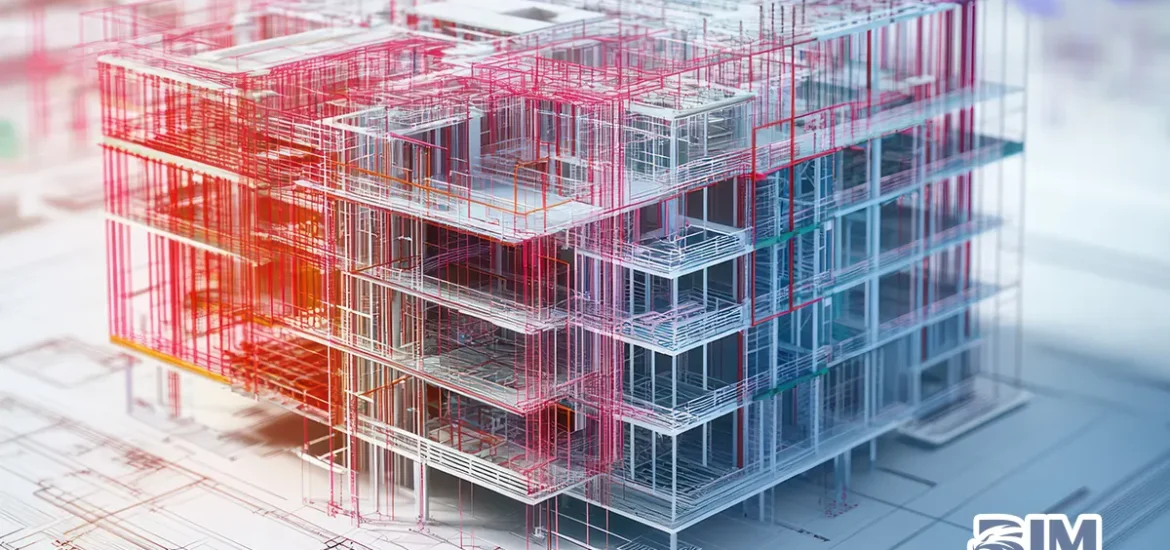
Architectural, structural, and MEP models form the foundation of BIM workflows. These models represent building systems digitally so they can be reviewed together.

Coordination and Clash Detection

This is where much of BIM’s practical value appears. During coordination, multiple discipline models are combined to identify spatial conflicts between systems.

Services like BIM coordination services USA help teams resolve those conflicts before construction begins.

Implementation and Workflow Setup

Organizations adopting BIM often require guidance in establishing standards, collaboration procedures, and model governance. This support typically falls under BIM implementation services.

Consulting and Process Design

For firms expanding their BIM capabilities, strategic guidance from BIM consulting services USA can help align teams, workflows, and project requirements.

What to Look For In A BIM Service Partner

Many firms assume BIM expertise is purely technical.

In practice, the most valuable BIM partners combine technical skill with construction experience.

Important factors include:

Industry experience

A hospital project has very different coordination challenges than a residential tower. Experience with similar project types helps teams anticipate issues earlier.

Coordination expertise

Modeling is only one part of BIM. The ability to manage coordination reviews and resolve clashes efficiently is often more important.

Communication workflows

BIM depends heavily on collaboration. The provider should integrate smoothly with architects, engineers, and contractors.

Understanding of standards

In the United States, frameworks like the National BIM Standard help define how information is structured and exchanged across project teams.

Technology And BIM Tools

Most BIM providers rely on a combination of industry platforms such as:

  • Autodesk Revit
  • Navisworks
  • Tekla Structures
  • Archicad
  • Bentley OpenBuildings

These tools support modeling, clash detection, and coordination workflows.

However, software knowledge alone does not guarantee effective BIM execution.

Successful projects depend on how teams use those tools together, not just which tools they use.

In-House BIM Teams vs External Support

Many organizations debate whether to build internal BIM teams or work with external partners.

Internal teams provide direct control over modeling workflows, but they also require significant hiring, training, and infrastructure investment.

For many firms, BIM outsourcing USA offers a practical alternative.

Outsourcing allows organizations to scale BIM support according to project demand while accessing specialized expertise without expanding internal teams.

Modern cloud collaboration platforms have also made distributed BIM workflows far easier than they were a decade ago.

Understanding BIM Pricing Models

BIM services are typically priced using one of several approaches:

  • hourly billing
  • fixed project pricing
  • model-based pricing
  • dedicated team arrangements

Costs vary depending on project size, complexity, and level of detail required.

But the cheapest option rarely delivers the best value.

The real cost question is whether the BIM partner helps reduce design conflicts and construction delays.

Those improvements often deliver far greater savings than the modeling itself.

Common Mistakes To Avoid When Hiring A BIM Partner

  1. Companies evaluating BIM partners often fall into the same traps.
  2. Choosing based solely on cost is one of the most common.
  3. Another is assuming that visually polished models automatically mean good coordination.
  4. Some firms also skip discussions about workflows and standards, focusing only on deliverables.
  5. The result is often a technically correct model that still fails to support project coordination effectively.

Questions To Ask Before Finalizing A BIM Service Provider

Before selecting a BIM partner, decision-makers should ask a few key questions:

  • How do you manage coordination between disciplines?
  • What BIM standards do you follow?
  • How are clashes tracked and resolved?
  • What experience do you have with similar projects?
  • How do you collaborate with distributed teams?

These questions reveal far more about a provider’s capabilities than a list of software tools.

Conclusion

Construction projects rarely fail because teams lack expertise.

They fail because information becomes fragmented across disciplines, documents, and decisions.

A strong BIM service provider USA helps prevent that fragmentation.

By supporting coordination, modeling, and collaboration across project teams, BIM partners help architects, engineers, and contractors make better decisions earlier in the design process.

Through services ranging from BIM coordination services USA to BIM outsourcing USA, the right partner provides more than technical support.

They provide clarity.

And in complex construction projects, clarity is often the most valuable resource a team can have.

Your Title Block Is a Contract with Reviewers (Texas & USA)

The Coffee-Table Test: Why the Title Block Decides Trust

Imagine you drop a printed drawing on a coffee table in a busy site office in Texas. A reviewer walks by, glances down, and has maybe eight seconds to decide if they trust the title block enough to keep reviewing the sheet.

They are not judging your hatches. They are scanning for fast truth:
What is this?
Where does it live?
Which version is it?
Who is accountable?

If the title block answers those questions at a glance, the conversation moves forward. If it doesn’t, you’ve just bought yourself a round of emails—no matter how good the design is.

The Boarding-Pass Analogy: How a Title Block Works

Think of every sheet like a flight.
The drawing is the airplane.
The title block is the boarding pass.

  • Flight number → sheet number

  • Destination → zone / level / key plan

  • Departure time → date and status of issue

  • Passenger name → drawn by / checked by

  • Gate and terminal → project name and number

When a boarding pass is clear, people move.
When it’s smudged or missing, nobody boards.

The same is true for construction drawings across the USA.

What Reviewers Need to See in a Title Block (and Only This)

Keep it short, clean, and consistent. A good title block shows:

Who + What

Project name and number, plus a sheet name that reads like plain English.
“Level 3 – Reflected Ceiling Plan” beats “RCP v2 FINAL FINAL.”

Where

A small key plan with the correct area highlighted, plus the level.
Reviewers should never guess where the view lives.

When

One clear status—For Coordination, For Construction, or As-Built—paired with a readable date.

Which Version

Today’s revision only. One code, one short description, one date.
If older revision clouds are still visible, trust drops immediately.

Who’s Responsible

Drawn By and Checked By initials.
This is not about blame. It’s about confidence.

That’s it.
If any of these are fuzzy, everything else slows down.

Small Title Block Choices That Make a Big Difference

  • Big and small text: Use two sizes only. Sheet number and name read first; everything else supports.

  • White space signals control: A crowded title block feels like a crowded project.

  • Dates that read fast: YYYY-MM-DD avoids confusion across teams and regions.

  • One truth per sheet: One status. One revision. One owner.

These tiny decisions matter more than graphic style.

A Real Story from a Texas Project Week

Two teams issued the same plan.

One title block said “CD.”
The file name said “IFC.”
The revision history told a third story.

That sheet bounced for three days and picked up multiple RFIs.

The other team’s sheet was boring—in the best way.
The key plan lit the correct zone.
The status matched the file name.
One revision note told the full story.

Same design quality.
Very different outcomes.

A Title Block Checklist You Can Pin Above Your Desk

Before issuing, check these in 30 seconds:

  • Project name and number shown

  • Sheet number and plain-English sheet name

  • Level and key plan with correct zone highlighted

  • Clear status of issue

  • One current revision with description and date

  • Drawn By and Checked By initials

  • File name matches what the title block says

If you can tick these quickly, a reviewer in Texas or anywhere in the USA can too.

Keep the Ripple Clean from Review to Construction

A clear title block does more than help today’s review.
It protects tomorrow’s work.

Clean status and revisions keep shop drawings aligned and prevent the “Which version are we building?” spiral. When we set up projects for clients across Texas and the USA, we bake these rules directly into Revit drafting templates so every new sheet inherits the same clarity.

If you want us to tune your current title block and run a quick before/after using one of your live sheets, share a sample through our Revit Drafting Services page. We’ll reshape the boarding pass so your drawings move through review without friction.

BIM Coordination

The 90-Minute BIM Coordination Sprint That Saves a Week (Texas & USA)

Why This BIM Coordination Sprint Works (and Why Weeklies Don’t)

Most “weekly coordination” calls drift: updates, screenshares, and not enough decisions. A BIM coordination sprint flips that. In 90 minutes you (1) triage what truly matters, (2) make decisions on the highest-impact coordination issues, and (3) close the loop the same day. Run this weekly and your RFIs drop, your clash detection list shrinks, and your first-pass approvals climb.

This BIM coordination playbook is tool-agnostic. We typically run it with Navisworks for clash tests, BCF topics for issue tracking, and production inside Revit. If you want help wiring this rhythm into a live job in Texas or elsewhere in the USA, our BIM coordination practice uses the same cadence on real scopes.

The BIM Coordination Sprint at a Glance (90 Minutes Total)

Prep – 15 minutes
Curate—not create—work. Refresh the clash set, group duplicates, rank by impact, and publish a short agenda.

Gatekeeper – 45–60 minutes
Decide only on parent issues that affect dates, cost, safety, or code. Everything logs as BCF topics (no screenshots).

Close-out – 15–30 minutes
Apply decisions to the model, regenerate the set, send a five-line summary, and update exactly one rule in your BEP.

That’s it. Small, boring, and repeatable—the kind of BIM coordination that actually moves a project.

Roles That Keep BIM Coordination Tight

Coordinator (owner of BIM coordination):
Runs the clash test, groups issues, sets the agenda, and moderates the call.

Discipline leads (Arch / Str / MEP):
Arrive with A/B options and a recommendation.

Gatekeeper (PM / CM / GC):
Breaks ties, enforces timeboxes, and records final decisions.

Scribe:
Logs BCF topics with clear titles, owners, and next steps.

On complex scopes, we often embed this BIM coordination sprint inside an MEP BIM workstream so the same people who will update the model and sheets are present.

PREP (15 Minutes): BIM Coordination Without the Noise

1) Refresh and Freeze

  • Regenerate the Navisworks clash test from the latest model set.

  • Freeze versions for the sprint window (no silent updates).

2) Group Duplicates

  • Collapse repeat hits into one parent issue (example: “Duct elevation offset along grid C, Levels 3–5”).

  • Kill anything outside this week’s BIM coordination scope.

3) Score Impact

  • Score each parent issue 1–5 based on critical path, safety, and cost.

  • Rank the top 10–15 parents—this becomes your agenda.

4) Publish the Mini-Agenda

Send 30 minutes before the call:
“We’ll cover 12 parent BIM coordination issues; goals are approve, redesign, or park. BCF link inside.”

GATEKEEPER: Making BIM Coordination Decisions That Stick

Ground rules (read at the start):

  • Decide on parents, not every child clash.

  • Options must be A/B with a recommendation.

  • If no decision in five minutes, park it and assign a duo.

What this sounds like:
“This BIM coordination issue blocks the curtainwall crew by Thursday. Option A: raise duct 75 mm. Option B: shift hanger line. Recommendation: A.”

How to log decisions fast:

  • Title: PLANT-3 / Duct vs Beam / Elevation Offset / APPROVED A

  • Note: Raise main 75 mm; confirm firestopping detail.

  • Attach: Viewpoint, owner, due date.

We keep the issue trail clean so downstream shop drawings don’t inherit confusion.

CLOSE-OUT: Lock BIM Coordination Decisions the Same Day

1) Apply Decisions

Owners make changes immediately or stage the work.
Coordinator re-runs clash detection to verify approved issues are resolved.

2) Send a Five-Line Summary

  • 12 parents reviewed; 9 approved; 2 parked; 1 redesign

  • Two code checks pending

  • Next sprint focus and required attendees

  • Link to BCF board and snapshot

3) Update One BEP Rule

Example: “All main duct centerlines on Level 3 target elevation X ±25 mm unless logged as an exception.”

One rule per coordination sprint prevents BEP bloat.

What BIM Coordination Looks Like in a Plant Room (Composite Example)

First run: 156 raw clashes in a dense riser bank.
After grouping: 18 parent BIM issues.
Gatekeeper discussed: 10.
Closed in a week: 9.

The result showed up cleanly in Revit drafting, and the next clash detection pass dropped by 80%. No email chains—everything lived as BCF topics with viewpoints.

Assets That Make BIM Coordination Sprints Work

Decision-ready viewpoints:
One image per parent issue with arrows and intent.

A/B option worksheet:
A: fastest path.
B: cleaner long-term path.
Record who can approve.

A real parking lot:
Start each sprint by clearing 1–2 parked BIM coordination items.

If you want help building these once and reusing them across projects, our drafting team folds them into BIM coordination and Revit drafting deliverables.

Metrics That Prove BIM Coordination Is Working

Track weekly:

  • Parent issues vs raw clashes

  • Approved vs parked ratio

  • Hours to prep the coordination set

  • First-pass approvals on affected sheets

  • Email threads replaced by BCF topics

When these move, you’re saving real time—and real money.

Common Coordination Pitfalls (and Fixes)

  • Over-modeling before decisions: Keep LOD tight to this week’s goal.

  • No owner on parked items: Assign a pair and a due date.

  • Screenshots in email: Move context into BCF.

  • Too many updates: Status belongs in email; BIM coordination sprints are for decisions.

For retrofit work starting from existing conditions, pair this sprint with a slim scan-to-BIM workflow so coordination starts from reality.

Bottom Line

You don’t need a bigger meeting. You need a tighter BIM coordination process that protects attention and creates a visible trail of decisions. Run this 90-minute sprint for two weeks and watch what changes: fewer loops, faster handoffs, cleaner packages.

If you want help setting up your first coordination sprint on a live corridor, riser, or plant room in Texas or anywhere in the USA, send the scope through our BIM coordination page—we’ll map the agenda and get the board ready.

LOD in BIM

Stop Over-Modeling: The LOD in BIM You Actually Need This Month (Texas & USA)

The Corridor Story: Why LOD in BIM Matters More Than Effort

You have a corridor on Level 3. Architecture wants a clean ceiling line. MEP needs hangers and sleeves. Structure guards a beam. Everyone opens the model and starts adding detail “just to be safe.” Two days later, the file is heavier, coordination slows, and the reviewer still asks the same question. The problem is not effort. It is modeling past the LOD in BIM you actually need right now.

For teams working on fast-moving projects across Texas and the USA, over-modeling is one of the quickest ways to lose time, clarity, and approvals. This post keeps it simple: choose the outcome, set the LOD in BIM for this month, and stop where the review can approve.

What LOD in BIM Means (in Plain Words)

LOD in BIM is not about how detailed your model can be. It is about how detailed it needs to be for the next decision.

  • LOD for design: enough information to approve intent

  • LOD for coordination: enough clarity to avoid conflicts with other trades

  • LOD for fabrication: enough detail for someone to build or install

Pick the outcome for this month. Model to that LOD. Leave the rest for later.

A Quick LOD in BIM Picker You Can Use Right Now

Ask one question before you model anything:

What will this sheet or view be used for in the next meeting?

  • Design signoff:
    Model at a design LOD in BIM. Show sizes, locations, and relationships. Skip tiny fittings.

  • Trade coordination:
    Model at a coordination LOD in BIM. Lock routes, elevations, sleeves, and major supports.

  • Fabrication or install:
    Model at a fabrication LOD in BIM. Add joints, connections, tags, and tolerances a fabricator can trust.

Put that answer in the meeting agenda so the whole team stops at the same LOD.

The LOD in BIM You Likely Need This Month

Early Design or Schematic LOD in BIM

  • Show rooms, walls, major openings

  • Place main routes and main equipment

  • Use typical sizes

  • Skip brackets, offsets, and boutique geometry

Coordination LOD

  • Lock centerlines and bottom-of-duct/pipe elevations

  • Size and place sleeves on grids

  • Add hangers only where they drive height or clash decisions

  • Cut sections at corridors, risers, and plant rooms

  • Use one consistent elevation rule

Shop or Installation LOD in BIM

  • Add joint types, connection details, and anchors

  • Tie tags directly to schedules

  • Freeze naming so shop drawings inherit the truth

  • Keep only what the field actually needs

Three Simple Rules That Stop Over-Modeling in BIM

  1. Model only what you will show on a sheet this month
    If it does not support a current decision or approval, leave a note and move on.

  2. Decide one elevation rule per area
    Example: “Main duct centerline on Level 3 targets X ±25 mm.”
    One rule prevents endless micro-adjustments.

  3. Use one view template per drawing type
    Consistent views mean faster reviews—and less pressure to over-model to explain yourself.

A Small Plant Room Example (LOD in BIM in Action)

Week 1 goal: prove the main routes work.
We modeled main ducts, pipes, sleeves, and equipment at a coordination LOD in BIM. No valves. No label forest. The gatekeeper call took 30 minutes and approved the layout.

Week 3 goal: release for install.
We added valves, anchors, and connection details only on the runs releasing to fabrication. The rest stayed at coordination LOD in BIM.

Same room. Two outcomes. Two LODs in BIM. Less rework.

What to Include vs What to Skip at Each LOD in BIM

Include Now

  • Sizes and locations that drive approvals

  • Sections through tight spaces

  • Elevations other trades depend on

  • One clear note where a decision is pending

Skip for Later

  • Decorative geometry

  • Every hanger or fitting on long runs

  • Repeated labels

  • Temporary objects you will delete after review

A One-Page LOD in BIM Checklist

Design Signoff

  • Room, wall, and opening layout set

  • Main routes placed and sized

  • Key equipment located with access

  • No tiny fittings or brackets

Coordination

  • Centerlines and elevations locked

  • Sleeves placed on grids

  • Hangers only where they affect height

  • Sections at risers, corridors, plant rooms

  • Elevation rule written in view notes

Shop or Install

  • Joint and connection details added where releasing

  • Anchor points tied to schedules

  • Sheet status correct everywhere

  • Views use the same template

  • File names match sheet numbers and status

If you cannot tick the boxes for the chosen LOD in BIM, the model is trying to do two jobs—and neither will approve quickly.

How to Keep Teams Aligned on LOD in BIM (Texas & USA Projects)

  • Start every coordination call by stating the LOD in BIM for this milestone

  • Put that LOD statement in the agenda and first slide

  • When extra detail appears, ask: “Which sheet is this for next week?”

  • If there’s no answer, park it

We apply the same discipline in Architectural BIM, MEP BIM, and Revit drafting so shop drawings do not inherit noise. This keeps Texas and USA projects lighter, faster, and easier to approve.

Bottom Line

Over-modeling feels productive. It rarely helps the next approval.

Pick the outcome. Pick the LOD in BIM that supports it. Stop where the reviewer can say yes. Your model will load faster. Your meetings will be shorter. Your sheets will pass the first time.

If you want a quick Level of Development pass on your current set, send one sample view and the next milestone date. We will mark what to include now and what to push later so your team can move with confidence.

Revit View Template

One Revit View Template to Rule Your Sheets for Texas & USA Projects

The Color-Grading Moment: Why a Revit View Template Matters for Sheet Consistency

Think of your model like raw footage. If every scene uses a different color grade, the film feels off. A Revit view template is your grade. One clear template gives every plan, section, and detail in your Texas or USA project the same look and logic, so reviewers recognize information without relearning your style on each sheet. That recognition speeds first-pass approvals and reduces review loops.

When we set up projects in Texas or across the USA, we bake the same base Revit view template into our Revit Drafting Services so future sheets start consistent from day one.

What a Single Revit View Template Really Does

It is not about making drawings pretty. It is about making them predictable:

  • Graphics stay consistent: Line weights, fills, and patterns read the same across disciplines.

  • Information carries meaning: Filters make systems and levels read with intent, not guesswork.

  • Reviews get faster: The reviewer’s eye does not need to adapt. They can focus on decisions.

The Simplest Way to Build Your Master Revit View Template

Start with one goal: make a plan view that a new reviewer can read in ten seconds. Lock it as a master Revit view template and clone it for sections, RCPs, and details. Focus on five choices that move the needle:

  1. Line Hierarchy: Big things read dark and thick; small things read light and thin. People forgive style, not buried structure.

  2. System Filters with Meaningful Labels: Duct mains, branches, and accessories should not look like cousins. Give each class a purpose.

  3. Cut vs Projection Clarity: Anything cut through is bold and legible; projections drop back. Depth is half the battle.

  4. Annotation Sizing That Survives Print: If it dies on a site printer, it’s the wrong size. Set it once.

  5. Scope and Crop Discipline: View range, crop regions, and scope boxes need to be set, not argued. Decide once and protect it.

Refine continuously – but the goal is one choice, applied everywhere, and protected.

A Fast Story from a Live Set

We inherited a mixed sheet set in a Texas hospital project. Plans came from three teams. Same model, three graphic dialects. The first coordination call got stuck on visuals, not design.

We created one master Revit view template and applied it to the loudest plan first. Ten minutes of tuning. Then we pushed it across all plans, RCPs, and key sections. The second review ran twenty minutes shorter. Not because we worked miracles, but because the set finally spoke one language.

R&D Corner: Try a Mini Test

Pick one corridor or plant room and run a tiny A/B test:

  • A: current views as they are

  • B: the same views with your new master Revit view template

Ask three people which set they can read faster and why. Bake only the changes that improve speed. Park anything that’s “nice but not faster.” We fold experiments like this into our coordination rhythm so graphics improve without derailing production.

Keep the Chain Clean From Model to Submittal

A single Revit view template does not stop at the view. It makes downstream work calmer:

  • BIM coordination benefits: everyone sees the same elevation logic and filters during review. Small disagreements do not become big meetings.

  • Shop drawing packages inherit clarity: Fabricators can trace a decision from plan to section without guessing.

  • Fabrication-ready projects: Our Shop Drawing Services keep the visual standard intact so packages read like they came from one voice.

A Tiny Checklist You Can Print

  • One master template for plans, cloned for RCPs and sections

  • Filters named by intent, not accident

  • Annotation sizes that survive a bad site printer

  • View ranges and crop rules set once and reused

  • No per-view overrides unless there’s a clear reason

Bottom Line

One good Revit view template pays you back every week. It shortens reviews, lowers redlines, and makes your sheets feel unified. Build it once, protect it, and let your team spend time on design decisions – not display settings.

If you want us to give a quick pass to your current views and turn them into a reusable Revit view template pack, drop a sample on our Revit Drafting Services page. We will send back a clean base and notes you can roll across the project.