Clean Submittals

From PDF chaos to clean submittals in 48 hours

Thursday, 6:12 p.m.

The email lands: “Attaching everything. Need a clean submittals Monday.”
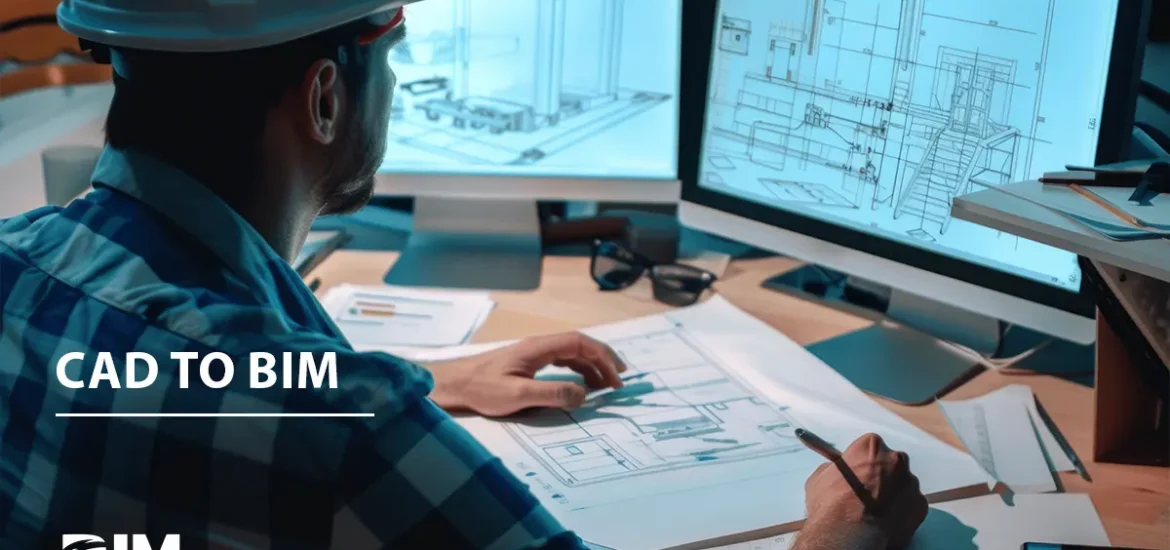
You open the folder. Half the files are scans. Some are sideways. Filenames read like inside jokes. A beautiful elevation is hiding between two crooked spec pages. It feels like someone emptied a shoe box on your desk and said, “Make it a book.”

Most teams panic here. The trick is to stop thinking like a modeler and start thinking like an editor. For the next two days, you are not making drawings—you are making clean submittals. You are making a newspaper. Same look, same order, same truth on every page. When a reviewer flips, their brain stays calm. That calm is what gets you the “approved.” If you want this calm baked into future sets, we set up that rhythm in our Revit Drafting Services.

The newsroom switch

I keep a clean working folder ready, like a newsroom layout waiting for tomorrow’s paper. I drag everything into “Incoming,” look at what I’ve got, and write a one-paragraph note to myself: how many files, which disciplines, what’s obviously broken. Nothing fancy. It gets me out of feelings and into facts.

Then I sort. Architecture with architecture. Structure with structure. MEP with MEP. I don’t rename yet. I just want to see the pile in sensible stacks. If something is scanned, skewed, or unreadable, I put a small dot next to it in my notes. Those dots are tomorrow’s time sinks, not tonight’s.

Before I shut the laptop, I choose one rule for names. Something a human can understand without opening the file. Project, discipline, sheet number, short sheet name, current rev, status. Clean, lowercase, no mystery. I’ll rename in one go tomorrow when my head is fresh.

I sleep.

Friday morning: the plain-English pass

Coffee in hand, I start with names. I open each stack and rename every file so the story reads in the filename itself. Think of it like writing headlines—clean submittals start with filenames that tell the truth. A reviewer should know what they’re about to see before they see it.

When I finish a stack, I copy the filenames into a simple two-column list: file on the left, human sheet title on the right. That list becomes my index at the end.

Next, I fix pages that break trust. I rotate the sideways ones. I deskew the scans so the text stops leaning. If a page won’t print cleanly, I nudge the margins. If a spec is locked inside an image, I run OCR so search will work. I don’t beautify. I remove friction—because clean submittals aren’t about polish, they’re about clarity.

At lunch, I pick one sheet that looks the most “wrong” and turn it into the standard everyone else will follow. I adjust the visible status line so it actually says what the team means. I make sure the current revision is the only story on the page. If a title block is missing half the truth, I add a simple footer band with sheet number, plain sheet name, date, and status. It’s not graphic design. It’s a seatbelt. By the time I’m done with that one sheet, I know exactly how the rest should look.

The afternoon is copy and paste. I give every page the same seatbelt. I don’t chase edge cases. If something is genuinely off, I add a short note to the first page of the set explaining the exception in one line. Reviewers forgive an honest exception faster than a silent inconsistency.

If the scope is headed for fabrication next, this same “newspaper” standard rolls straight into our Shop Drawing Services so fabricators don’t inherit confusion.

Saturday: make it read like a book

Saturday morning, I assemble by discipline. Architecture first, in sheet-number order, then structure, then MEP. Each discipline becomes a small booklet. Then I stitch the booklets into one master. I keep both versions. Reviewers like choice. Some scan the whole set. Some go straight to their stack.

Before lunch, I write the front page. One page. It lists the sheets in plain English, shows the current revision with a short description, states the status of issue, and gives a single contact for each discipline. Clean submittals don’t need cover art—just clarity.

After lunch, I do the flip test. I open the master PDF and flick through like I’m late for a meeting. Two seconds per page. When something snags my eye, I stop and fix it. A rotated plan. A faint key plan. A status line that changed wording mid-set. This “dumb” flip test catches more than any checklist.

Late afternoon, I check the boring things that sink ships. Do file names match the sheet identity? Does the sheet status match the front page? Are we telling one revision story across the set? Clean submittals always tell one story.

By early evening, the set feels like a newspaper. Same voice. Same train tracks. No surprises.

Sunday: short note, calm handoff

Sunday is quiet. I prepare a short cover note. What the set contains. Why we’re issuing it. What changed since the last issue in one line. Who to call for architecture, structure, and MEP. I attach the master, the discipline booklets, and the one-page index. I save a copy of everything in an archive folder with the date so we can prove exactly what left the building.

Sometimes a client wants the same structure to flow into fabrication. That’s when we fold the standard into Shop Drawing Services. If they want the “newspaper mode” to start upstream, we tune their templates as part of Revit Drafting Services so the next submittal starts clean.

Monday, 9:03 a.m.

The reviewer flips the file like a magazine. The index matches the pages. The status is the same everywhere. Revisions tell one story. The filenames help them jump to what they need.

There are still design questions—but there’s no confusion.
“Thanks. This is clear.”

That sentence is what clean submittals in 48 hours are for.

Sheet Review Mistakes

10 Sheet Review Mistakes That Make Reviewers Distrust a Sheet

The “two-minute flip” moment

Reviewers don’t read every word. They flip. If a sheet feels inconsistent or unclear in those first two minutes, trust drops and questions rise. Most sheet review mistakes show up right here—before a reviewer has even started checking dimensions or scope.

Below are the ten mistakes that cause that feeling—and the small fixes that earn confidence fast.

Where it helps, I’ve linked to the pages where we wire these habits into real projects with our Revit Drafting Services and downstream Shop Drawing Services.

1) Mixed status on one sheet

Why it hurts: “For Construction” in the title block but “For Coordination” in a view tells two stories. This is one of the fastest sheet review mistakes to trigger reviewer hesitation.
Fix: One status per sheet. Pull Purpose of Issue from a single parameter and show it once. If you need both, you need two sheets.
Helpful if you’re standardizing: see how we bake status logic into templates in Revit Drafting Services.

2) Revision history that disagrees with clouds

Why it hurts: Reviewers see Rev D on the block and Rev C clouds on the face. They stop trusting both.
Fix: Only the current cloud set is visible. Archive older clouds or move them to a non-plot layer. Keep the revision description short and literal.

3) Title block that hides key facts

Why it hurts: If reviewers can’t answer “what, where, which version, who” in five seconds, they slow down.
Fix: Make the block a boarding pass: project and sheet identity, level/zone with a small key plan, current revision with date, and Drawn/Checked initials. We tune this as a base in Revit Drafting Services.

4) File name that doesn’t match the sheet

Why it hurts: Mismatched names derail search, indexing, and trust.
Fix: Name files so a human understands them without opening: project-discipline-sheetnumber-sheetname-rev-status.pdf. The sheet face must match the file name.

5) Inconsistent graphics across views

Why it hurts: Three plans, three “dialects.” Reviewers waste time learning each one.
Fix: One Revit view template as your visual standard. Lock lineweights, fills, tags, view ranges, and filters. Only override when there’s a clear reason. If you need a starter, we build these packs inside Revit Drafting Services.

6) Key plan missing or wrong

Why it hurts: Reviewers shouldn’t guess where a view lives.
Fix: Always show level and a tiny key plan with the active zone highlighted. Drive the highlight from view parameters so it stays accurate when views are duplicated.

7) Labels that won’t survive a site printer

Why it hurts: Perfect on your monitor, unreadable in the trailer—one of the most common sheet review mistakes discovered too late.
Fix: Set annotation sizes that print clean at your standard scale. Test on a low-ink office printer before you issue. If it dies there, it will die on site.

8) View clutter that buries decisions

Why it hurts: Every tiny fitting is modeled and tagged before the team has agreed on the route. Reviewers can’t see the big idea.
Fix: Match level of detail to the next decision. For coordination, lock centerlines, elevations, sleeves, and only the hangers that drive height. Save fabrication detail for the package that needs it. We run that discipline in our coordination rhythm and in Shop Drawing Services.

9) Dimensions that fight each other

Why it hurts: Competing dimensions or too many decimal places signal uncertainty.
Fix: Dimension to grids, datums, and centers with a consistent precision. If two rules clash, pick one and note the exception in plain English near the view.

10) No single owner for the sheet

Why it hurts: “Who fixes this?” becomes an email thread.
Fix: Always show Drawn By and Checked By with dates. If there was no check pass, say so. Clarity builds trust, even when timelines are tight.

Two quick habits that raise trust

Many sheet review mistakes never reach a reviewer if you do these two things consistently:

  • Run a flip test before you issue. Two seconds per page. If your eye snags, so will a reviewer’s.
  • Make a one-page index. Plain-English list of sheets, current revision, status, and who to contact by discipline. It sets the tone for the whole package.

If you want these fixes baked into your template, we can tune your title block, view templates, and export naming as part of a quick pass in Revit Drafting Services. If you’re heading to fabrication, we’ll carry the same clarity forward in Shop Drawing Services so submittals feel consistent from first sheet to last.

Bottom line

Reviewers don’t need perfect. They need consistent and clear. Eliminate these sheet review mistakes and your sheets will read faster, generate fewer redlines, and move through approvals sooner—often without a single design change.

CAD to BIM

From CAD to BIM to AI-assisted modeling: the next evolution for AEC firms

Why this shift matters (minus the buzzwords)

Most firms still straddle two worlds: legacy CAD files on one side, growing BIM deliverables on the other. The move from CAD to BIM isn’t about ripping everything up or chasing the latest tools. It’s about creating reliable foundations—so models support design intent, coordination, and approvals instead of slowing teams down.

Adding AI-assisted modeling comes later. When done right, it builds on solid CAD to BIM standards and workflows, moving routine work off your team’s plate while people focus on decisions that actually need human judgment.

Think in phases:

  • tidy up CAD to BIM conversions and standards,
  • stabilise exchanges with IFC and information rules,
  • then add AI helpers where they save real time.

CAD to BIM: get the foundations right

What good looks like

  • Convert 2D into structured Revit models tied to sheets, views, and schedules.
  • Align to a simple BEP, shared coordinates, naming, and title-block rules.
  • Exchange open data using IFC when it helps cross-tool collaboration.

Helpful references

  • buildingSMART on IFC (what it is and why it’s vendor-neutral): Intro (buildingSMART Technical) and IFC overview. (buildingSMART Technical)
  • ISO 19650 info-management suite (BEP, delivery/operations, security): BSI overview. (BSI)

Mature BIM ops: make coordination repeatable

Once models are stable, make coordination boring (in a good way):

  • Federate models, run clash checks, and keep issue logs consistent.
  • Use open standards where it helps: IFC for data, BCF/IDS for exchange and requirement checking (buildingSMART: Standards & IDS/BCF). (buildingSMART International)

Add AI-assisted modeling (where it actually helps)

Start small. Pick places where rules are clear and repetition is high.

1) Generative design for fast option studies

Define goals and constraints, then generate alternatives and shortlist the one that meets your rules inside Revit. Autodesk primers: Generative Design for AEC. (Autodesk)

2) Scan-to-BIM with ML-assisted segmentation

Use computer-vision tools to segment walls, slabs, openings, and main MEP trunks from a point cloud; model only what the scope needs for as-built BIM. A solid primer: Automatic Scan-to-BIM & Semantic Segmentation (MDPI). For methods, see Scan-to-BIM mapping in GIS (MDPI). (MDPI)

3) Automated QA + issue surfacing

Script checks for naming, parameters, and required views. Push likely conflicts to your clash detection dashboard for review.

A two-week pilot (keeps risk low, results clear)

Week 1

  • Choose a small zone or single system route.
  • Write constraints, outputs, and LOD in your BEP.
  • Run generative design or scan-to-BIM (not both). Shortlist with the team.

Week 2

  • Develop the chosen option, log hours vs baseline, capture three screenshots.
  • Update your standards with one rule you’ll keep next time (naming, view template, or export).

Measure: time saved in BIM modeling, open clashes pre/post, first-pass approval rate.

What to keep doing as you scale

  • Keep IFC clean for exchanges (and version it).
  • Keep ISO 19650 habits light but consistent.
  • Use BCF/IDS where issue and requirement traffic gets busy.
  • Add AI only where scope is clear and results are reviewable.
BIM 3D Modeling

How AI is transforming BIM 3D modeling

A quick reality check

Most days in BIM 3D modeling still look like this: nudge a wall to grid, trace a point cloud, fix a tag, run clash detection, repeat. AI won’t “do BIM” for you. But it will take off the repetitive load so your team can focus on design intent and decisions. Think generative design for fast options, scan-to-BIM for cleaner as-builts, and lightweight QA that keeps sheets review-ready.

If you like the sound of fewer loops and cleaner handoffs, read on.

What’s actually changing in BIM 3D modeling

Generative design (structured options, fast)

Define goals and constraints, let the engine produce alternatives, then shortlist and develop the winner in Revit. Autodesk’s docs are the best primer: Generative Design in Revit (Product Help) and Generative Design for AEC. (Autodesk Help)

Scan-to-BIM (smarter segmentation, less tracing)

Computer vision is improving point-cloud segmentation and classification, so you model only what the scope needs for as-built BIM. See this open-access review on automatic Scan-to-BIM & semantic segmentation (MDPI) and a recent research example on single-image to semantic BIM. (MDPI)

Real-time review and digital twins

Shared contexts and simulation are becoming practical. Good overviews: AEC Magazine on NVIDIA Omniverse in AEC and NVIDIA’s AEC page. (McKinsey & Company)

Use-cases you can run this quarter

1) Early-stage generative design for layouts & routing

Set rules (grids, adjacency, daylight, min runs), generate options, shortlist by score, and develop the winner in Revit.

2) Faster scan-to-BIM on retrofit scopes

Use AI-assisted segmentation for walls, slabs, openings, and main MEP trunks; avoid over-modeling; output as-built BIM for coordination.

3) Automated QA and issue surfacing

Auto-check naming/parameters/views, and push likely conflicts to a clash detection dashboard.

A simple stack that works (no rip-and-replace)

Pitfalls to avoid

  • Over-modeling: AI makes it easy to add detail you don’t need. Stay tight to scope.
  • Weak constraints: generative design is only as good as the inputs.
  • Messy scans: poor point clouds = poor scan-to-BIM. Validate before modeling.
  • No gatekeeper: decide who approves AI-generated options and how they enter the model.

Two-week pilot plan (to get one real win)

Week 1 — pick a small area or single system route; write down constraints, outputs, and LOD; run options or segment the cloud; shortlist with the team.

Week 2 — develop the chosen option, log time saved vs baseline, capture 3 screenshots, and fold learning into your BEP templates.

What to measure: hours saved in BIM 3D modeling, open clashes pre/post, first-pass approval rate. For context on why efficiency matters, McKinsey’s report on construction productivity is a useful backdrop: “Reinventing construction” (exec summary). (McKinsey & Company)

Where this is heading

Expect more assistant-style tools in authoring apps, better point-cloud semantics, and “option diffs” that keep non-modellers in the loop. Keep your stack simple, your standards clear, and your pilots small. That’s how you bank the wins.